With a lot of the initial board structure built, I moved over to the less complete right-hand side. While adding the previously fabricated cardboard I-beam walkways, I also added some plain foam panelling down the wall for some visual interest. Whilst the walkways looked pretty unsupported there, I had planned to add some vertical pipes for support: to add a bit of cover for games, and also increase the feeling that this area of the board was more of a maintenance space for the original builders of the district. One thing worth covering is that I deliberately staggered these new walkways from the main floor levels, to make the potential lines of fire more interesting. The walkways also stick out a bit further than the main floors.

Adding in the pipe was pretty easy, just some cut to length PVC plumbers pipe. It was obviously important to include some open branches higher up; it wouldn’t be Necromunda without some mysterious leaking water.

The pipes were then tied into the structure with some radial brackets. The rearmost pipe I actually kept free as it didn’t tie into the foundation structure, and I wanted the option to be able to shift it about when I came to work on the lower areas of the board.

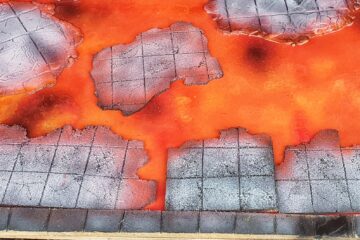
The intent was to have something of a pool or hive-swamp at the bottom of the table. As this board is intended to be part of a modular structure I didn’t want to have the complexity of aligning resin pours, so I decided to add a weir/retaining wall around the base. I thought about doing the retaining wall vertical so I could put it flush up against other boards but in the end I went for a slope to give me a better look on this board. Maybe I will rue this later.


When I was done with the weir I added some detail to the back wall of the pool, blocking it in with rough cut foam and adding some drainage pipes. I broke and flared the ends of some of the pipes – maybe their breakage is responsible for the pool forming in the first place. I didn’t bother texturing the foam for the back wall as I knew I was going to be covering it up later.

Finally, whilst all the pool work was drying I made a start on the ‘neon’ for Neonheim, a big ol’ retro signboard built from scratch. Fortunately, as it is for an underhive hell-city I didn’t need to be too neat. The sign would slide into some small tubes I had previously set into the walkways below the ruined bridge.


I was happy when that was all done and the sign support posts aligned properly with the tubes in the walkways (phew).

I wonder what the sign should say?
Up next, some more work on the pool.
That’s it for now.