Hi, welcome to the third part of my guide to teach you what not to do when you make a board, so you can learn from my mistakes. If you missed them, the previous parts are here:
I knew that I wanted a modular floor, but the Warcry board size is a bit tricky, 22” by 30”. I decided that having it split down the middle, I could do six sections, four would be 11” by 11”, and then two 8” by 11”, but what to make them out of?
I was going cheap and had experience of cork from bases. So, I bought a big pack of cork board, and cut it down to the sizes I wanted.
Next my issue was the bits where I wasn’t having a full section. I don’t have any pictures from my experimentation here, but I tried using a cut 11”x11” square, and then cutting jagged lines corner to corner. This worked great as bulging platforms. The issue I hit was one of slotting together.
If you imagine a corner of the table, if I wanted to have some partial tiles into the lava then either I had a corner tile (which isn’t what I was cutting), or I would slot together 2 of my bulging platforms to make a corner. That sounds great, other than over the board size I had, all those sections would need to be identical to slot together.
In the end, rather than worry too much about this, I cut odds and ends of different sizes, some corners, some against the flat of the squares, some a lot shorter. My aim was that the flat parts should fit together, and anything else could be a nice lava gap.
Mistake number 5 – Cork is great on bases, but 11”x11” cork is a bit… floppy. Think about the size of the materials and the thickness properly before investing.

The next element was a turning point in the build, and probably a move away from my initial design principals. On my Twitter feed, Dark Fantastic Mills advertised a new product, called a Splat. This was from a range of Dwarven ruins, and was effectively a 3D-printed dungeon tile, with magnets and some broken scenery to fit on.
It was 20% off for launch week, so I bought a set of two small units and one large unit. I hadn’t cut any tile designs into much cork at this point. So, whilst I waited for my delivery I bombarded Garry with questions about the splats. He told me stone slab sizes so I could match that on my cork, and the thickness (they were 1mm thicker than the cork tiles I’d made).
Keeping everything the same height was going to be key, to ensure the future terrain I used was stable. The Dark Fantastic Mills splats came with scenery to stick on and magnets. The thought occurred, what if I used some sort of magnetic material 1mm thick under the cork? This would help support the cork from being too floppy and would allow magnetised scenery to stick.
It couldn’t be metal as I needed to easily cut it to size, so I settled on 1mm ferrous sheet. I tested its magnetic responsiveness when it arrived, and it worked great with magnets. Unfortunately not with magnets through 3mm of cork, however.
Mistake number 6 – If you want something to be magnetic, buy magnetic, not receptive. Having investigated things further, you can get sheets of magnetic material that’s self-adhesive. It wouldn’t have cost much more either. At some point I may buy some and change it all out.
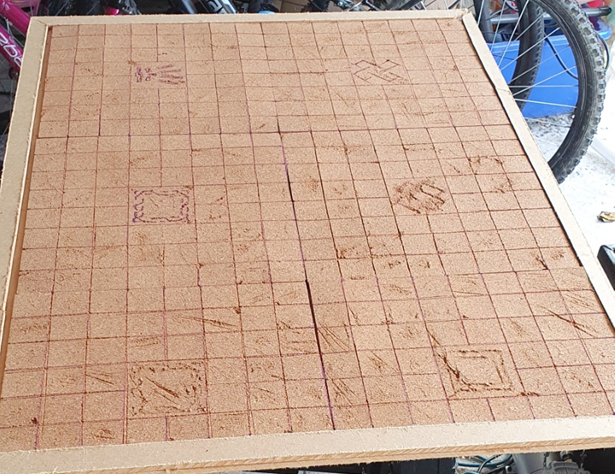
It was time to shape my cork boards. Based on the stone slabs on the splat, they actually worked out very nicely for the tile sizes, with only the 11” x 8” tiles needing incomplete stone slabs. One detail on the splats was larger decorative slabs. I decided to incorporate that into my design and so with a purple felt tip pen (first one I grabbed), I duly marked out the slab edges onto each cork tile.
The slabs were then defined first by using a hobby knife and metal ruler to cut a short depression into the tiles, and then expanded upon by using a small file in the cracks.
I made random cuts on each of the boards, filed some bits down, and roughly took out some corners here and there. All to try and make the stone slabs look used and distressed.
Emboldened with how this was going, I tried to draw and cut out decorative patterns in the large slabs. It turns out making things look damaged is a lot easier than making things look like some artistry.
Mistake number 7 – I tried some complicated designs, and all sorts of other patterns. The better solution would have been not to bother with the large slabs as I think it’s better to do something simple well, than try something too complex and fail.
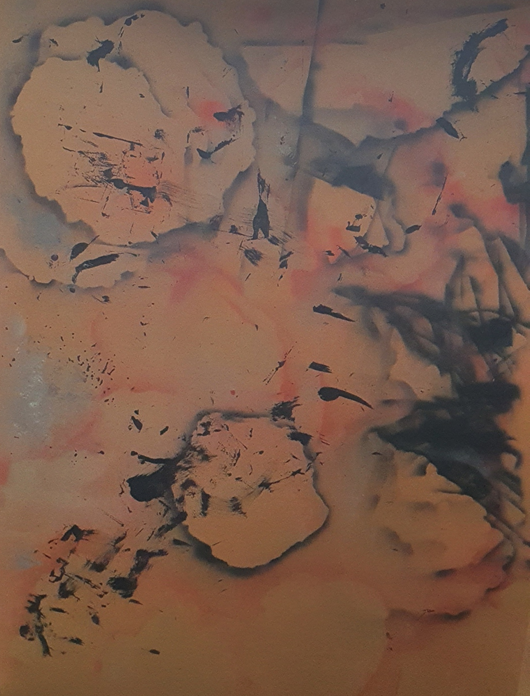
I filed down the 3d printed parts and then set about priming everything. Not having learnt from the board, I just used my airbrush again. Black base, then a few shades of grey getting lighter. I tried to be haphazard about placement. For the edges and splats, I then used a mix of Angron Red clear, and Vallejo fluorescent orange, then a bit of black drybrushing.
Mistake number 8 –Despite using all the same paints across everything it turns out mdf, cork and 3d plastic all absorb paint differently. They’re close enough that I don’t mind too much, but this was easily predictable, and I could have tried to compensate for it with more forethought.
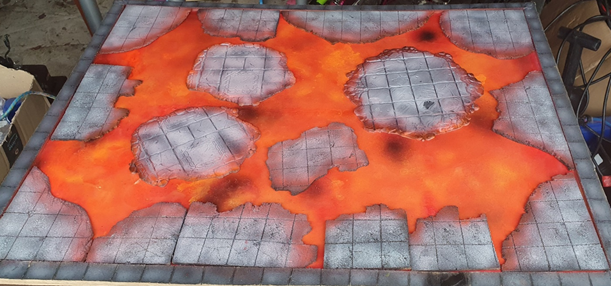
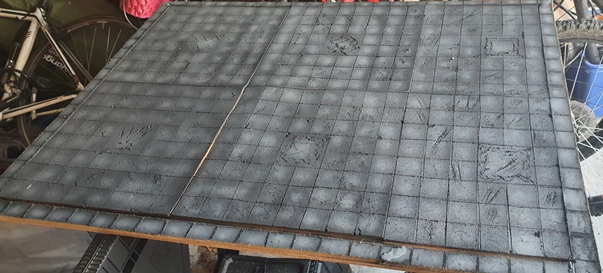
With this done the base board itself, with the modular lava and tiles elements, was completed. I’m really happy with how the options come together, though I ended up cutting up some of the edge pieces into smaller ones to give more flexibility.
As you can see from the pictures, I can go from fully solid to a lava death-trap easily, or something partway in between. I even wrote some house rules of the floor collapsing a bit each turn, using a dice roll to remove a section.
The total build costs at this point was around £45, of which almost half of that was the 3d printed terrain. I’d made some mistakes but had something that had come together that I was proud of.
Then it all went wrong…