Over the lockdowns in the UK I painted up four Age of Sigmar armies, but when Age of Sigmar 3rd edition was announced for the summer of 2021 I decided that it would be a good idea to paint another new army to learn the new edition with. In this article I’ll talk about why I chose Sons of Behemat for my first AoS 3.0 army, and how I planned, built and painted the army. There will be a follow-up article soon in which I’ll cover playing my first games with the army and what I’ve learned so far.
Why Gargants?
A Sons of Behemat army consists of one thing: Gargants (a.k.a. giants). There are only two kits you can buy for the army: the Mega-Gargant kit, which builds one of three Mega-Gargant models, and Mancrusher Gargants, a much older Games Workshop kit that builds smaller Gargants (still around three times the size of a typical human scale mini).
In the run-up to the release of AoS 3rd edition, I wasn’t feeling hugely excited to play any of my existing armies. The AoS 3 rules have a strong focus on monsters, and none of my armies played well into that. My most recent army project at the time was an Ossiarch Bonereapers force, but their unique army rules meant that they wouldn’t be able to use the new command abilities introduced in AoS 3, which was one of the elements of the new rules that I was most excited to try out.
I was in danger of getting un-hyped for AoS 3 because I was worried about not having an army to use that would be both fun and reasonably competitive, so I made the decision to paint a new force to use for getting started in 3rd edition. This was when I started looking at Gargants.
When Sons of Behemat were first released in 2020, I wasn’t particularly interested in them. The Mega-Gargants were undoubtedly cool models, but the aesthetic and playstyle of the army didn’t really grab me. However, in early 2021 I ended up playing a game with Sons of Behemat in a Tabletop Simulator AoS event, and found them surprisingly fun to play with. When I came to pick a new army for 3rd edition, Sons of Behemat had two key things in their favour: firstly I was confident I could get an army together very quickly, since they are very low model count, and secondly they are an army that gets to make good use of all the new AoS 3 toys. Every model in a Sons of Behemat army is a monster, which makes them perfect for using the new ‘Monstrous Rampage’ rules introduced in AoS 3rd edition. They also play well into the new Battle Tactics, where you pick a mini-goal to achieve each turn. With some of my armies, like Kharadron Overlords, I was looking at the list of battle tactics with some trepidation wondering how we’d ever manage to score half of them; but Sons of Behemat are good at both killing things and holding objectives, and they have a lot of good options for choosing battle tactics.
Planning my army
Since there are three Mega-Gargant types I figured I’d probably end up painting one of each for my army. The most competitive builds often take multiples of the same type, but I thought I’d have more fun painting them if I made them all different, plus since different AoS factions can take different Mega-Gargants as mercenary allies it would leave me with the option to take a Mega-Gargant mercenary for any other AoS army in future. I decided to paint six mancrusher Gargants as well, which would give me quite a bit of flexibility to try out different army lists. I was much more excited about painting the Mega-Gargants than I was the Mancrushers, so I decided to be sensible and eat my vegetables first, and get all of the Mancrushers done before I picked up my first Mega-Gargant.
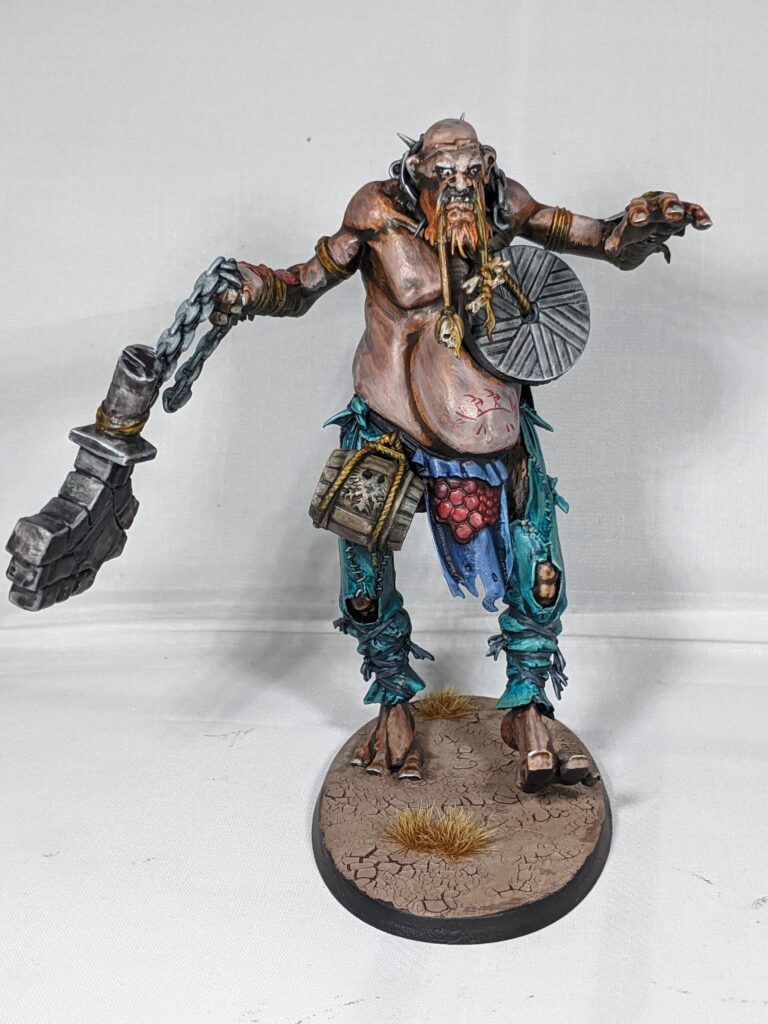
The Mancrusher Gargant kit is quite an old one, the main body of the Gargant is monopose but it comes with a wide choice of different heads and different arms that let you introduce a fair amount of variety. Since I was planning six of them though I wanted to try to mix things up a bit more, so I did some minor conversions on two of them to change their legs and give them a different pose. I did this by chopping up the tops of their legs and sticking them back on in a different pose, with greenstuff to fill the gaps. I’m far from an expert converter and the re-posed Gargants probably don’t look particularly natural, but it served its purpose to add some variety into the group, and since the kit is fairly comic looking in any case I think it works well enough. One of them in particular looks a bit like he is staggering around drunk, which feels fairly appropriate for Gargants.
Painting my army
I started painting the army in mid-June 2021, a few weeks before the release of AoS 3. I was keen to get it painted up as quickly as possible so that I’d be able to start gaming with it, but I also wanted it to look good on the tabletop. I’m not usually a particularly fast painter – I get through a lot of models, but more by spending a lot of time painting than by practicing speed painting techniques. I usually take a fairly standard basecoat -> shade -> highlight approach to painting, but for this army I decided to try something different, and experiment with using Contrast paints over undershading. This is a very common technique, but it wasn’t something I’d done much of previously so it would be a bit of a learning experience for me. I tried it out on a Warhammer Underworlds warband to make sure I had at least some idea what I was doing, and then launched into painting my first Mancrusher.
The idea of undershading is that you paint the model (very roughly) black and white before you add colour over the top. There are different approaches to this, but what I ended up doing was spraying the model black, then spraying it lightly with grey from above, and then adding extra shading and off-white highlights with a brush. This stage took maybe an hour per model: I went over them making sure that the balance of greys and blacks was right, and then lightening up any areas I wanted to be highlighted with an off-white paint. I tried to pick a direction for the light to come from (from the front top left of each model), and place the highlights accordingly. This meant that most of the off-white areas were on the front and top of the model, with the backs being fairly dark.
For the Mega-Gargants I was able to add most of the highlight undershading by dry brushing the model off-white, since there is a huge amount of texture on the kit. For the Mancrushers there is very little texture as they’re older models, so I had to be neater and paint the highlights in. I also added texture to cloth and leather areas by painting in scratch marks (either with dark marks on light areas, or light marks on dark areas, depending on how light or dark the base shade was).

Once the undershading was complete, I then added colour with paints from Games Workshop’s Contrast range. I did some experiments beforehand to find out which Contrast paints worked best over greys and blacks, and found that in general, dark colours were more effective. Ultramarine Blue and Dark Angels Green were particularly successful. In most cases I diluted the darker Contrasts about 1:1 with Contrast Medium, to make sure that the undershading still showed through. For most areas of the model I then added one round of highlights on top of the Contrast to pick out edges and raised areas, using brighter colours on the parts of the model that I wanted to appear more brightly lit. I also added in a bit more texture on some of the materials, particularly the cloth and leather.
The flesh tones were harder, as most of the flesh tones are quite light and didn’t really work at all over dark areas of the model. The one that was most successful was Fyreslayer Flesh, which I used undiluted. This came out ok but left quite a patchy look on the Mancrushers who have large smooth areas of skin. To deal with this, I then glazed Rakarth Flesh highlights over the skin in the areas that I wanted to appear lighter. This took quite a few coats, but resolved the patchiness and made the skin tones look more interesting. For the Mega-Gargants, rather than glazing I gave them a light drybrush of Rakarth Flesh, as unlike the Mancrushers their skin is very well textured and takes a drybrush extremely well.
Metallics are tricky with undershading, as most metallic paints have strong coverage and will cover up the initial layers. Additionally, I was trying to give the idea of the light coming from a particular direction, and the shininess of metallic paints wouldn’t be consistent with that. Fortunately, there aren’t a lot of metallics on Gargants, so what I ended up doing was painting all of the metallic areas in thinned down grey or black Contrast and then adding thin white highlights to represent shine. This worked ok, I think had there been more metallic areas it would have risked looking very dull, but in the context of smallish areas of a large model it looks good enough.
Because I was trying to get the army painted quickly, I didn’t worry too much about details. I mixed up the cloth colours as I didn’t want the Gargants to look like they were wearing a uniform, but each Gargant only has two colours for cloth. For materials like leather, wood and bone I used the same colour throughout the whole army. The Mega-Gargants have a lot of extra detail like skulls and severed heads: in general, I tried to use as few colours as possible to pick these out, and didn’t worry much about highlighting small areas of detail.
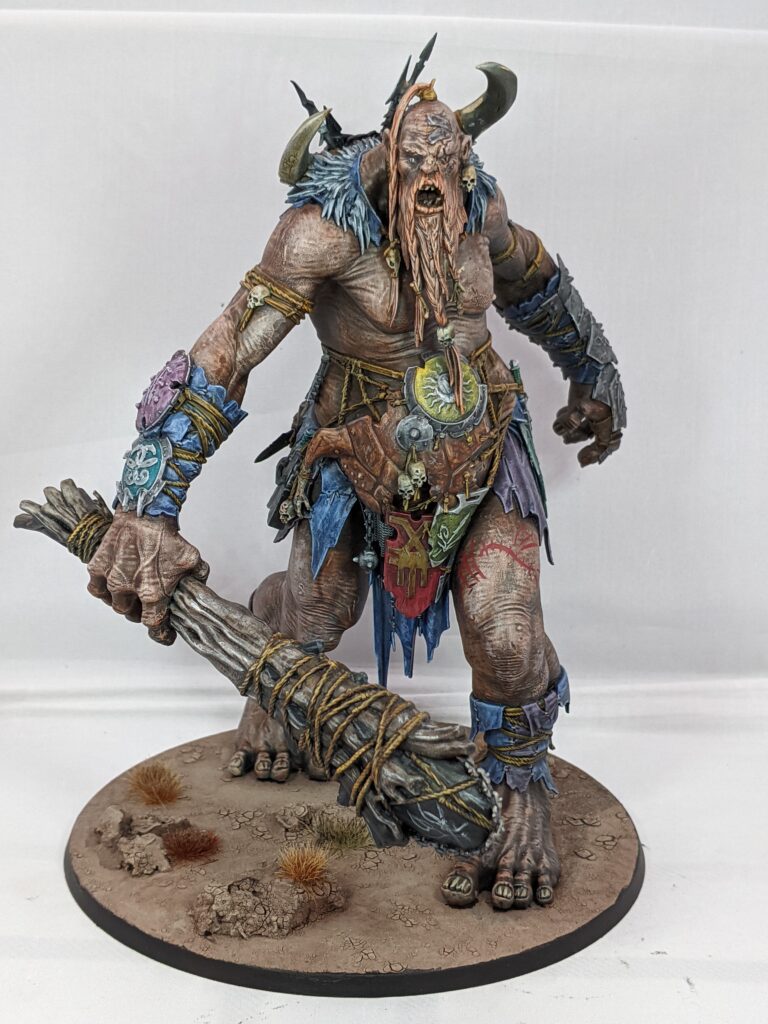
The Mancrusher Gargants have some big areas of bare flesh, so I decided to make them a bit more interesting by adding freehand tattoos. The idea behind it is that the Gargants believe that their strength comes from their bellies, so they tattoo pictures of big monsters on their bellies to make themselves stronger. This worked great on the Mancrushers, but when I got to the Mega-Gargants I realised that most of them have their bellies covered by armour or clothes, so I put their tattoos on their thighs instead. The best I’ve managed to come up with for a lore explanation for that is that it’s one of the Mancrushers who does the tattooing, and he can’t reach high enough to do the tattoos on their stomachs.
For the tattoos, I wanted them to be simplistic (because firstly Gargants don’t seem like great artists, and secondly it had to be within my capability to freehand the design), so I decided to do cave art style representations of Age of Sigmar monsters. I sketched out a few possible designs, and then practiced them a lot of times on paper before painting them. Some of them worked better than others, but generally I think they came out pretty well, and they help to give the Mancrusher Gargants a bit more personality.

Summing up
I found Gargants a very fun army to build and paint. It took me just over a month to get a 2000-point army of two Mega-Gargants and six Mancrusher Gargants painted up, though I’ve since expanded the army by adding a third Mega-Gargant. Look out for a follow up article soon, in which I’ll cover how I’ve got on piloting my new army on the tabletop.