Having got a copy of Frostgrave 2nd edition for Christmas, Osprey Publishing’s fantasy skirmish game of “wizards, battling through a ruined frozen city in search of magical artefacts”, and with lockdown continuing, I had plenty of time on my hands, so I decided to make a table for it. This was my first large scale terrain project so I was leaping in at the deep end, but I hoped that the crumbling, snow-bound nature of Felstad would help cover any mistakes I made along the way.
A couple of years ago a seller was offering a bunch of Hirst Arts (https://hirstarts.com/) ruins for cheap as they were miscasts, and when I say a bunch, I’m not kidding. I ordered some, and then after a delay the seller threw a bunch more in as an apology. I ended up with an entire cardboard box of this stuff.
I dug these out and decided they would be the perfect basis for the bulk of the table.
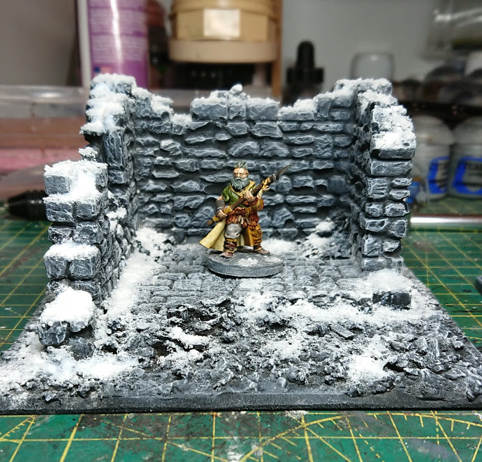
I started with a test piece, just so I could make sure my proposed methods actually worked. I mounted the ruin on a piece of 3mm foamex, and spread some Polyfilla over it to add some texture. For basing terrain, I can’t recommend foamex enough. It’s easier to cut than MDF, tougher than foamboard, and doesn’t warp when you glue it.
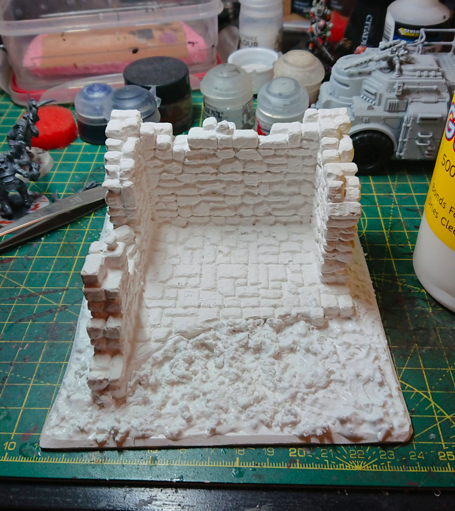
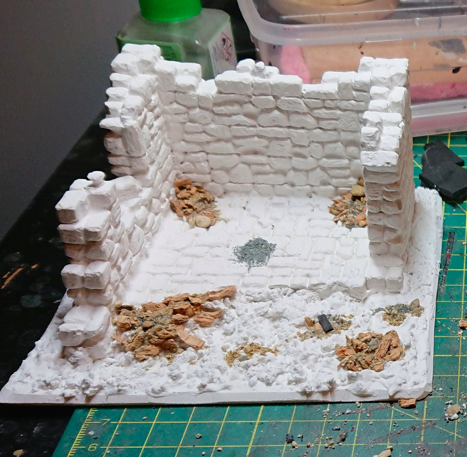
I then added a bit of sand and cork ballast in places to represent rubble. This was all from a bag of mixed basing supplies I had bought previously.
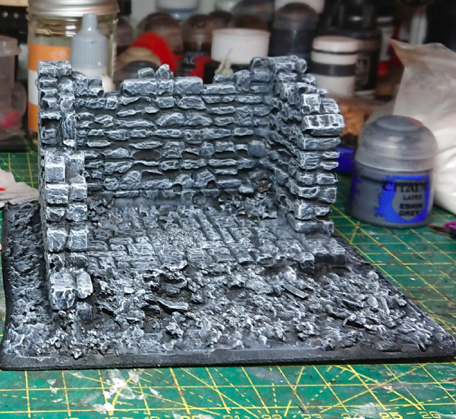
I knew I’d be doing a lot of these, so I picked a very easy paint scheme, so I sprayed it black and drybrushed up through three different greys, a dark, medium, and light, focusing the lighter colours towards the top of the stone work. I drybrushed it with white to represent frost and tried to get this spread evenly over the whole piece. The end result is a little monochrome, but it gave a nice cold effect, and I wanted my Felstad to feel like a lifeless place that had been frozen for a thousand years.
For the snow effects, I combined mod podge gloss and ground fine white granite (from my bag of mixed basing materials again) in various ways and concentrations. For snow drifts, I mixed them into a paste and spread it along walls and in corners, wherever I felt snow would gather, and then sprinkled granite on top. For areas where I just wanted snow to have landed, I brushed on mod podge and sprinkled granite on top. This stage is also great for covering any mistakes you might have made in the build or painting!
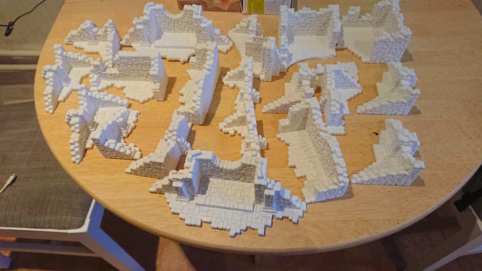
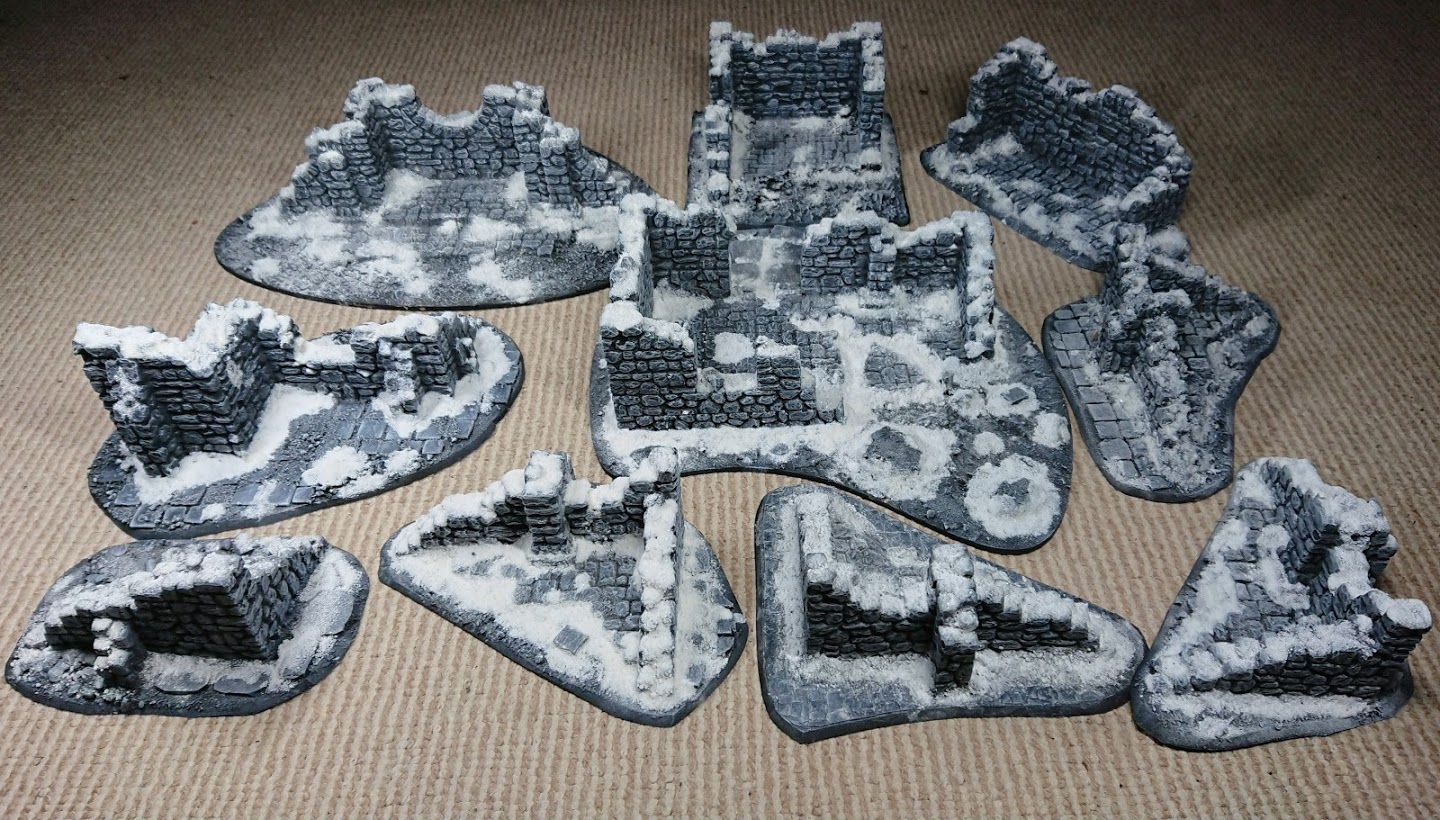
I then proceeded to make a whole bunch of these. I spent about 2 weeks churning this stuff out. Mostly it was corner pieces, but I also had a couple of larger pieces. They were all done in the same way as my test piece, but I also started using EVA foam to make flagstones to make the pieces feel more like they were part of a city. I also found putting XPS foam bricks in among the rubble helped tie the bases to the ruins. I also combined a couple of pieces to make a ruined house.
So, I had plenty of terrain, but it was all single storey scatter pieces. My experience with Necromunda told me that people unwisely climbing up tall buildings and then plummeting to their doom made skirmish games 83% more fun.
So, next time, I’ll cover how I started to add some verticality to the table.