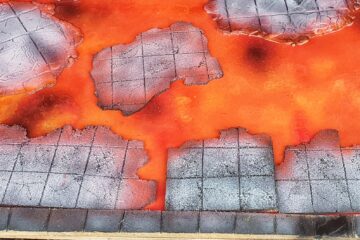
Back in the Underhive.
With the basic arrangement fixed I sketched out some ideas for how I wanted to develop the board, particularly with a balance between aesthetics and usability. I had this big buttress roughly in the middle of the board and I thought about taking it up to the top like it was supporting some upper level of the hive. In the end, however, I decided that was probably quite visually boring and I wanted something with some more shape/depth to it. A broken bridge/arch seemed like a good move as it also implied a world out the front of the table, perhaps now inaccessible. Also, the broken section would add some opportunity for a varied texture and some visual interest.

Being Necromunda I didn’t want things to look too medieval so I knew I’d be using a lot of I-beams and other steelwork. Heavy steelwork would also help capture that early 20th century aesthetic I was after. Plastic I-beams would be a bit pricey for the amount I needed, so I was set to make my own from chipboard/cardboard* from the off. Fortunately, the Victorians liked to fabricate their I-beams too so it would hopefully help not hinder the look I was after.
*chipboard helpfully being a term for both heavy card and also a building material used premonitory for the structure of flooring. The card one is much easier to cut with a hobby knife.

These beams were built up from curved cut section and glued together. I could have used a gluegun for this but I find the strings of glue really irritating so I went for Tacky-Glue for building nearly all my sections.
These two actually flared out slightly as they dried but as this was an unmaintained underhive bridge that has collapsed, this didn’t seem like an issue. The joints with the straight section were reinforced with a doubler plate (much like they would be for an old fabricated I-beam).

Beams in-situ
Checking the beams worked with some bricks laid in with them. I started experimenting with some patterns for the flat section too (not glued yet).

I levelled off the sides of the bridge with some thin slices of foam and started building up a brick texture. For the main walls I left space for the floors to glue on but for the buttress I didn’t as I didn’t want to have to worry about lining floor up to two gaps.

How do you make bricks? Well I slice a load of thin strips of foam into big and small rectangles and then put them into a pot with a handful of reasonably rough rocks (about the size of a finger end) and give them a good shake until the corners are rounded off and the faces have gained some texture. The shaking takes about 5-10 mins and is pretty boring as you cannot really do anything else, maybe watch youtube videos with the captions turned on.
My rocks are gardening slate and they’re slowly getting worn down, hence all the dust in the pot. I really could do with some granite rocks instead.

Starting to really build up the brickswork, as well as adding some secondary steelwork to the bridge section and door lintels. To glue down the beams I tend to use wood-glue or Tacky-glue, for the bricks I have a big tub of cheap DIY PVA which I can just slather on all over. It’s very watered down but that makes it fine for covering large areas which are going to have no load on them.

With most the bricks attached on the left hand side of the board I started to add some floors and more stairs. I only added these foreground elements once I was done with the majority of the brickwork so I didn’t lose any access. I meant to add a cutout for pipes to this floor and forgot 🙁
For anything structural like the stairs and floors I used a good wood-glue, maybe it’s overkill but I don’t want them falling off. Again I could use a glue-gun to not have to wait for things to dry but I find glue-guns give a less strong bond and more significantly glue-gun glue has quiet a noticeable volume to it which makes it harder to get flush joints. Though, this can be a benefit if joining two not very true surfaces.
On the lower level in the left corner I added some foam to represent plaster work. It’s mostly there to add equal depth to the bricks and I’ll skim it later to blend the actual change over.
On the right I’ve started to add a structural surround to the main area of the board.
On the nearly finished upper left I added in a vent made from chipboard.

Most the brickwork on the main wall was finished at this point. The right-hand side had most of it’s primary structure done. I’ve started adding decoration to the stairs, I don’t really like the side plates, I think they lose some of the form from that side but I’ll just have to detail them up a bit more.
I added some broken pipes coming out the bridge for variety, and I think it really helped convey the feeling of a structure which had collapsed.
Next up, the right-hand side floors and the other half of the brickwork on the buttress…

