Converting, Kitbashing, and Why It Might Be For You!
A quick safety note: some of the tips here involve chopping and hacking your miniatures in ways that weren’t intended by the designers. Be careful when using sharp tools!
There are a raft of valid and understandable apprehensions over kitbashing; the worry of putting valuable plastic at risk, concerns of “ruining” a model, uncertainty over costs, fear of failure, and plenty more. I’d love to say that they’re all unfounded but honestly, I’ve experienced every one of them during my time in the hobby. But that needn’t stop you!
So why do people do it? For me, the appeal is easy to articulate: altering and changing your models affords an extra level of expression and choice beyond instruction booklets and colour selection. If you’ve ever thought “I wish this mini was posed that way” or “I wish this mini had that equipment”, then that possibility opens up to you (though admittedly, gated behind a range of skill levels). It also allows you to play within the (almost) infinite settings of tabletop games – there can’t be out-of-the-box models for every idea, but every idea can, probably, be made real!
As with almost everything, this is all easier said than done. But – when it goes right – there’s a unique creative joy in making something aesthetically greater than the sum of its parts.
I’m not going to tell you what bit to attach to what model, but I do hope to tell you why it’s okay to just dive in, present a gradual approach that might help your foray into kitbashing and conversions, and give a few examples from my own experiences. I’m going to focus on plastic kits, but the overall approaches apply equally to both resin/finecast and metal miniatures.
First Step: Swaps
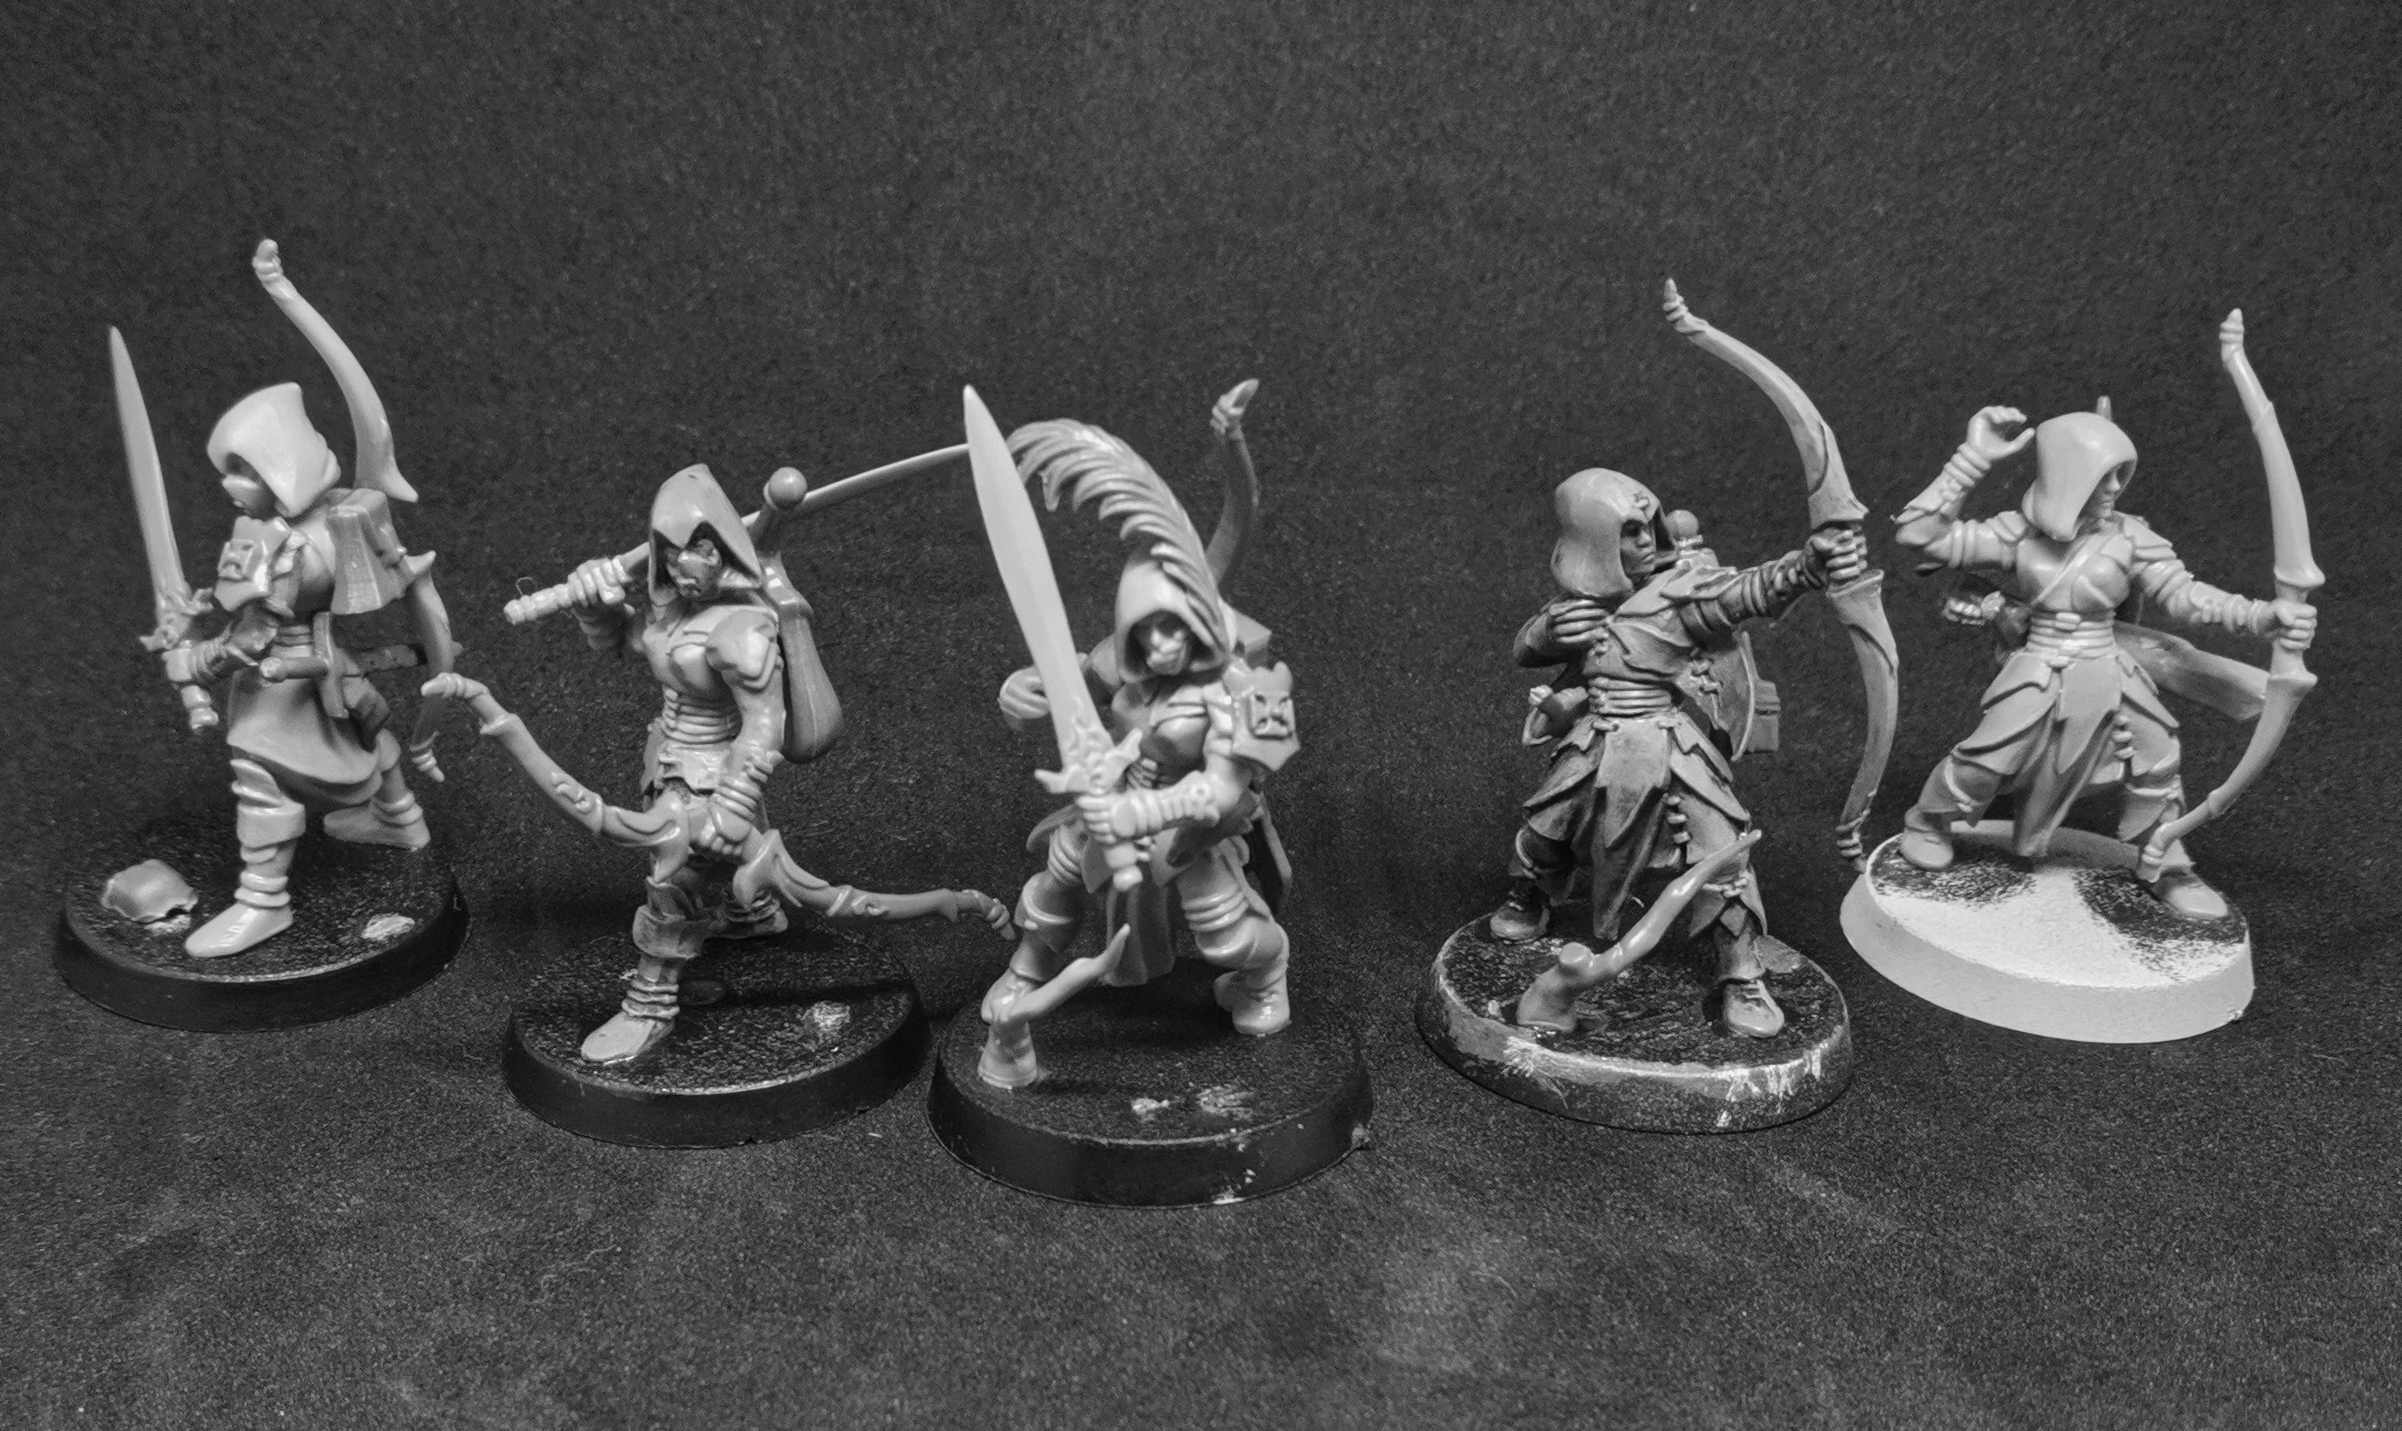
The simplest kitbash is the trusty headswap. Chris Peach (of Warhammer TV fame) makes great use of Freeguild Pistolier heads on Cadian Shock Troops to create his “Ventrillian Nobles”. Whilst headswaps are usually limited to multipart kits, the approach is the same for any “X”-swap; find a leftover backpack, weapon, arm, or pair of legs, and hold it up to your mini. Does it look like it’ll fit okay? If so, lucky you, the kitbash is on! But perhaps there’s some small nub of plastic in the way that prevents that perfect fit… In that case it’s time to break out the knife and clippers.
Cutting at a mini to create a flush surface is probably the most risk-free modification you can do: even if you screw it up, it’s going to be hidden in the joint between the pieces. On top of that, the melting-and-solidifying action of plastic glue means you should get a solid weld, even without mirror-finish surfaces.
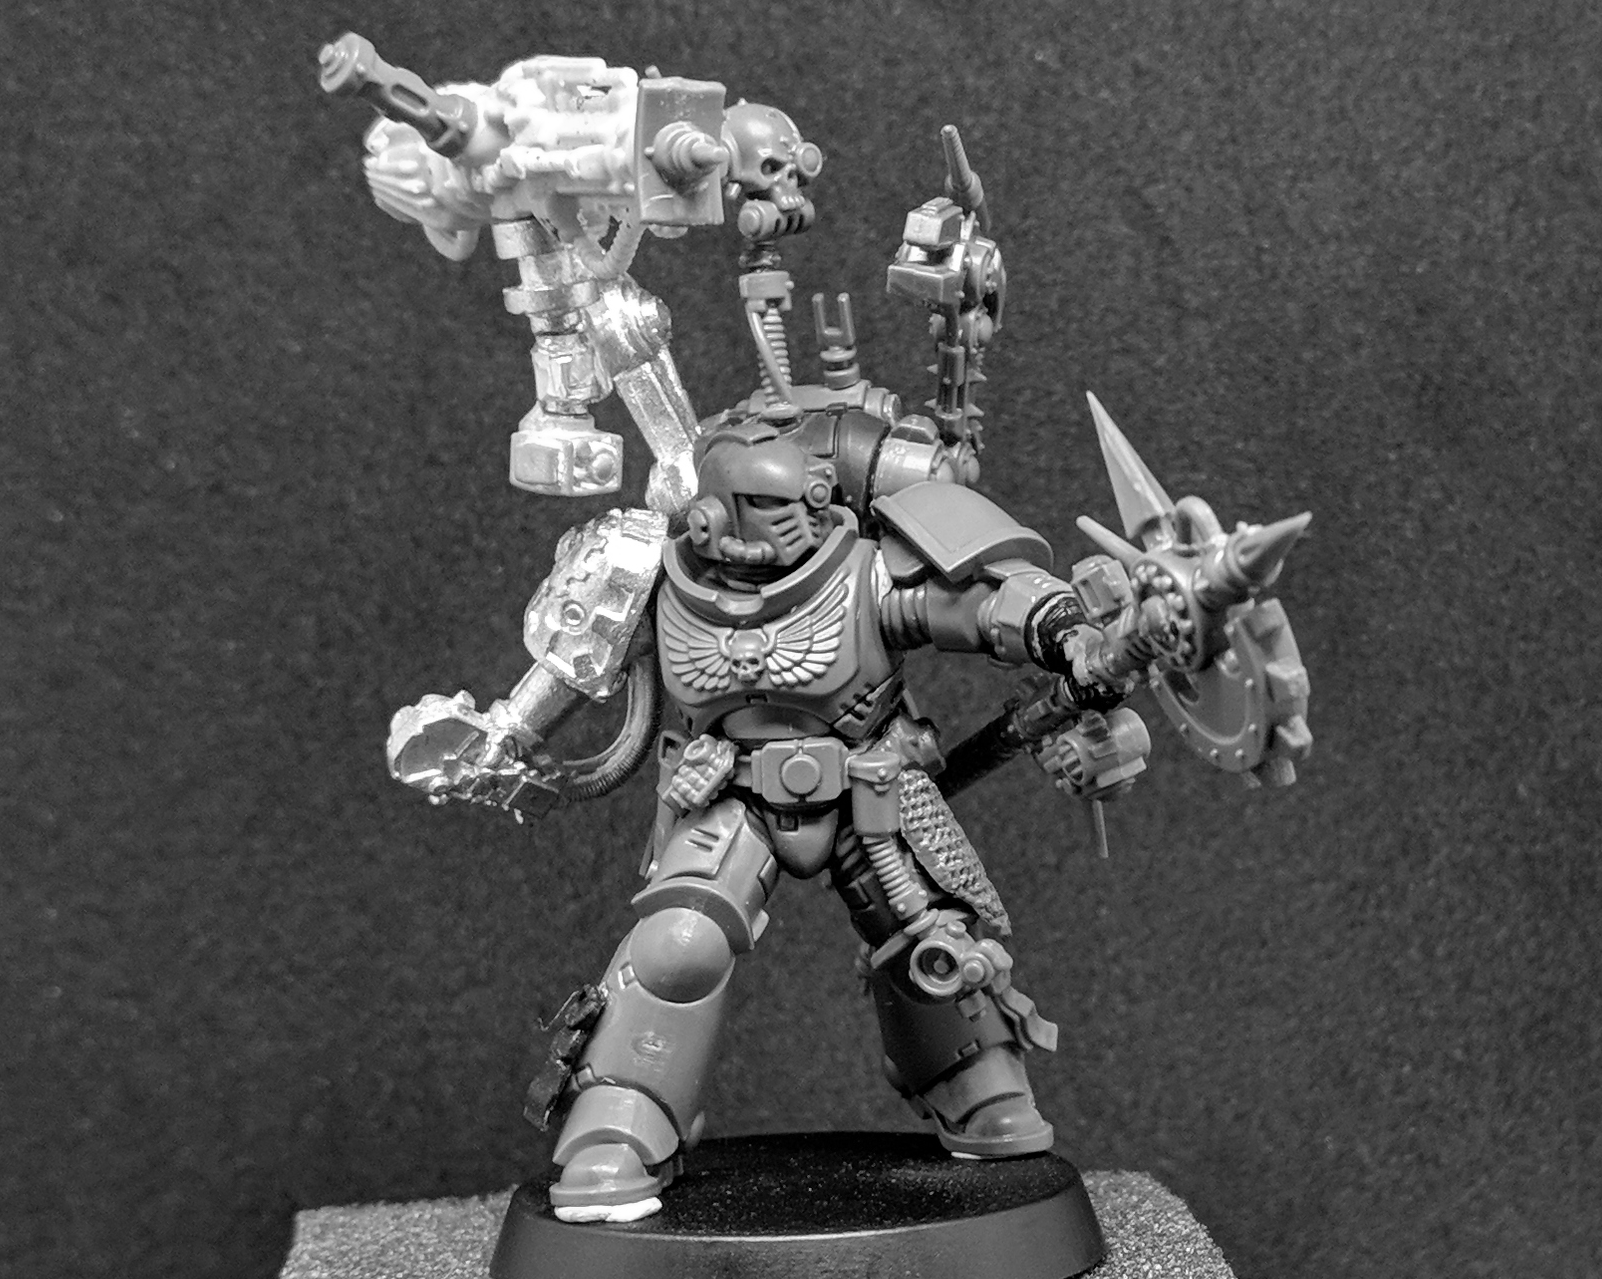
My Black Legion Heretic Astartes army is a mishmash of these types of conversions. Whilst the Space Marine range is broad and interchangeable enough to make head/weapon/leg/etc swaps almost trivial, I also used a few ancient backpacks that required trimming and cutting off the backpack-locating hemisphere, and a few pairs of possessed legs that required cutting down to fit more easily with the ‘standard’ torsos.


Minor Mods
Taking these first cutting steps is a convenient bridge to another type of conversions, those that I’d term “minor modifications”. Through the careful removal (and re-attachment) of parts of a model, you can make characterful modifications.
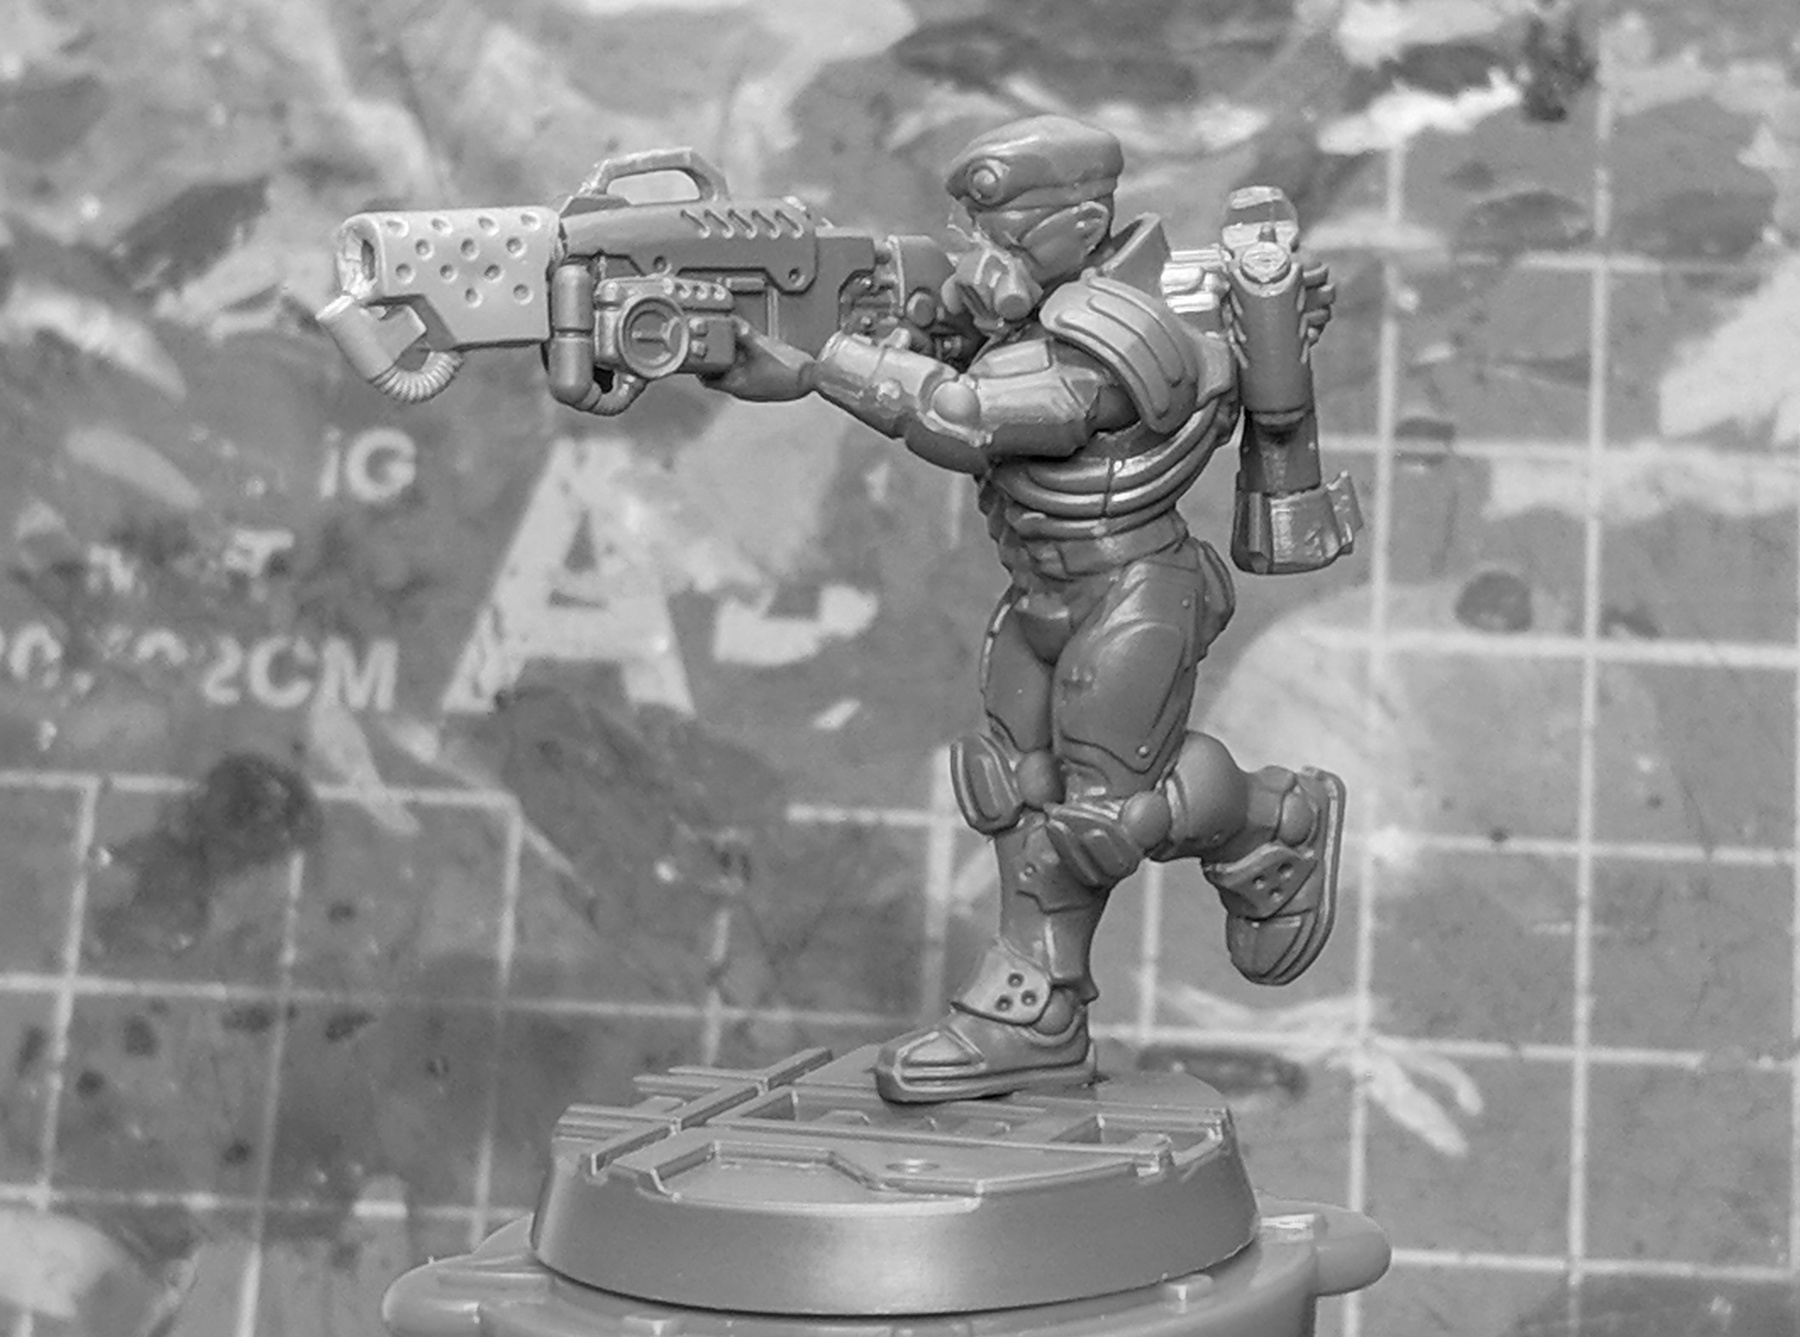
The following “nonstandard pattern” lasgun was made with only a few small changes. I cut away the front sight and replaced it with a scope, then lengthened the barrel using a banner pole, and lastly swapped the battery for a boltgun magazine. These came together to give a more rifle-like appearance. This only took a knife and some plastic glue.

Such changes as these are also nicely tested on spare weapons. For example, these counts-as Phoenix Guard (my Brotherhood 2020 MVPs) are based on old High Elf Lothern Sea Guard who’ve just had their spear tips replaced with Freeguild Guard halberd blades. Though GW kits might be optimising away some unneeded parts recently, your leftover sprues should have a few subjects ripe for experimentation. Some other examples of smaller mods might be cutting away the aquila on Shock Troopers’ helmets to make space for… something else, or swapping the weapon on a moulded arm.


When you’re comfortable making the small swaps, you might find that you gradually feel more comfortable making bigger changes. Understandably, the bigger the cut, the bigger the risk. Personally, my mind can’t help but wander off to bigger and more involved projects.
Grand Ambition
When it comes to more ambitious projects, it’s almost inevitable that the investment is going to go up (after all, a jump in price is going to be part of the reason why it’s ambitious to begin with!).
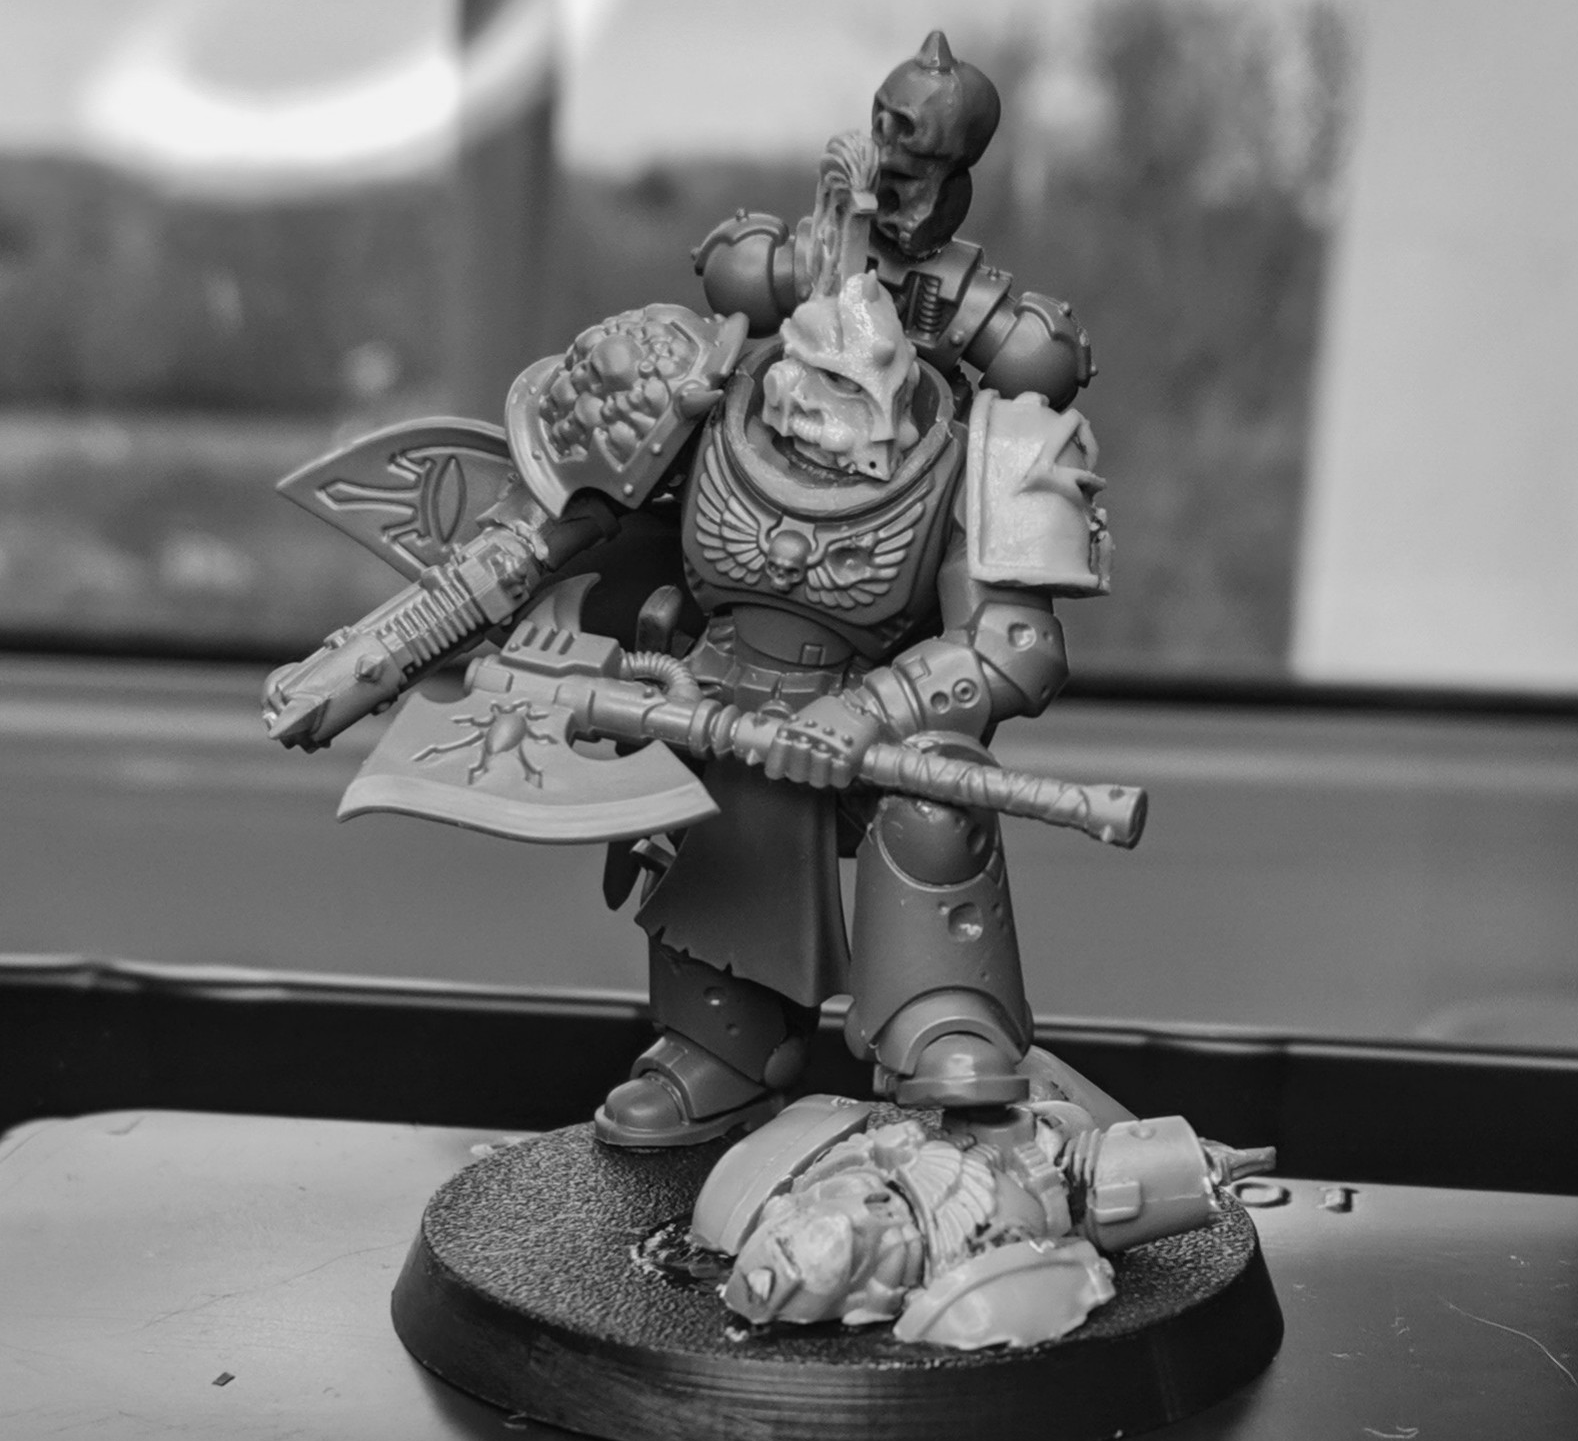
A couple of years ago, I wanted an alternative Maulerfiend kit. I’d seen the Varanguard kit and thought “Wow, wouldn’t those look great with giant metal tentacles coming out of them!?” I quickly realised I’d made a mistake when I placed the 75x42mm cavalry base next to the Maulerfiend’s colossal oval base. Luckily, the Maulerfiend is a great model that now sits proudly amongst Abaddon’s gang, and Varanguard are great models that are simple to whack back on ebay. Regardless, it was a formative lesson for me in the importance of planning.
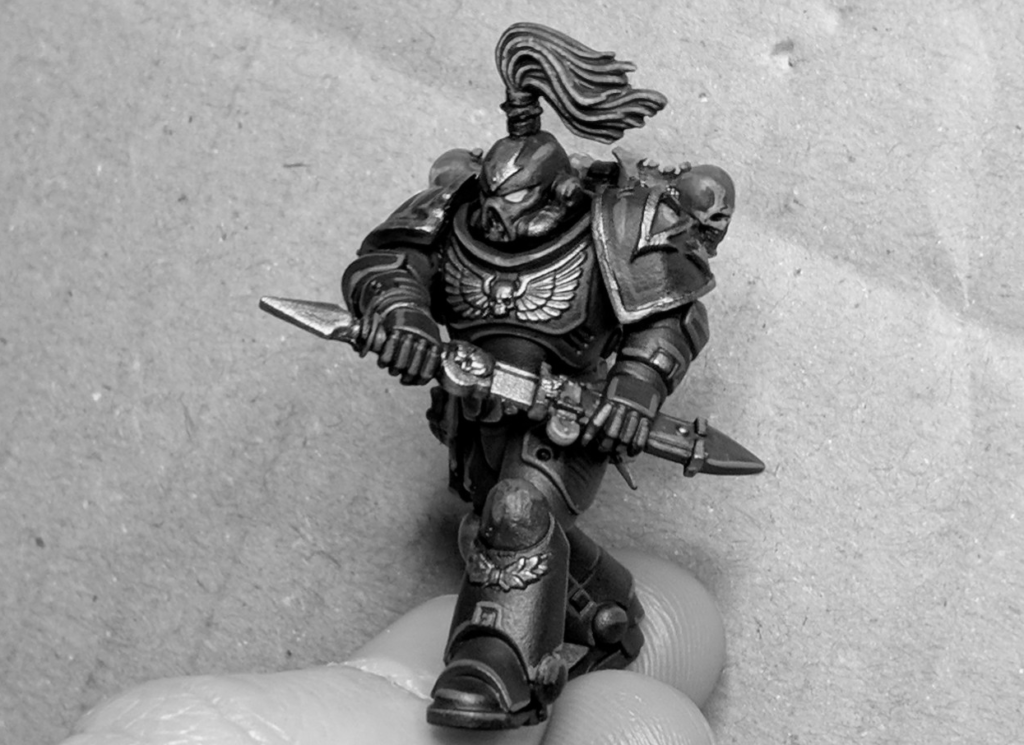
When you undertake something more ambitious, it’s vital that you take time to plan out your approach. This needn’t involve making complex drawings, mock-ups, or measurements, but with some scale-comparison checks and examination of sprues online (if you can), you’ll help prepare yourself. As an example, 35 years ago in late 2017 I saw someone else’s conversion of a Slaughterpriest with Hackblade into some kind of World Eater-esque space marine. At the time I was really lamenting the fact that the Abaddon model only came up to Guilliman’s shins, but this né-Slaughterpriest was a vision of the possible.
By comparing photos and scales, I decided that it would be possible (with some bitz sourced from eBay & co, and judicious application of a scalpel) to make a Better Abaddon™. As is always the case, not everything turns out perfect; some pauldrons I’d bought didn’t quite fit, and some accessories weren’t quite shaped right. But because I’d spent a decent amount of time comparing scales and sprues, the base of the conversion was enough that it worked. I wouldn’t claim the final result was perfect, but it is certainly one of the conversions I’m most proud of.


(Of course, 2019 brought a stunning update to Abaddon, but Oldbaddon still stands proudly in my cabinet).
Once you begin attempting more intense conversions, I’d suggest a few points to bear in mind:
- Don’t give up (easily) – If you’ve had an idea, the chances are that there is a way to make it work. If your first shot doesn’t work, keep at it; change it, add a bit, remove a bit, tweak the pose ever-so-slightly until you’re close. Whatever the end result, it will be yours, it will be unique, it will have taught you a lot, and you should be proud of it.
- Don’t overplan for green stuff unless you’re confident in your sculpting ability, or are willing to accept your practice attempts! Personally, I don’t get on with green stuff; I’ll use it where there’s no alternative, but even then only in a place where few people will see it. In Oldbaddon, I had to squash a small ball to provide a better join between the torso and legs. In the Gore-Grunta boss in the end gallery, I used green stuff to fill in his feet and a few small holes, and to make an (unsatisfying) couple of straps. It has a valid and important role to play, but be wary of any thoughts of “I’ll simply sculpt the matching arm out of greenstuff…”
- Try to think outside the box [art]. Whilst mono-range mashups (that is, mixing together kits from the same faction) are a great kicking-off point, have a browse through the less-visited stores and see what piques your interest. There’s no reason you can’t mix Ossiarch Bonereapers with Tyranids, or Adeptus Mechanicus with Sylvaneth, if you can think of a reason it’d be cool!
- …And off the back of that last point, let your imagination run, and see where it takes you. Mash two (or three, or four!) miniature ranges together in your head, and think of a reason why it might fit. Then see where it takes you; perhaps the Adeptus Mechanicus/Sylvaneth mashups could be wooden mechanical constructs whose spirits have come alive? Perhaps Ossiarch Bonetyranids represent an especially chitinous offshoot of a hive fleet?
- Finally, don’t be afraid to ‘fail’! Although (in my opinion) most conversions based on a solid idea have real potential, sometimes it’s simply beyond reach. Most recently, I was inspired by the Mortian Heavy Wheeled Tank, but my own Games Workshop-based attempt has been permanently shelved. I just couldn’t get it right. But that’s okay! It was great fun getting it to the stage it’s at, and maybe in the future a flash of inspiration will come to the rescue.

Just do it!
I think kitbashing is great fun – it’s by far my favourite part of the hobby. Search social media for tags like #kitbash and #conversion, and see what inspires you.
I hope you’re hyped to get converting. I’ve included a few more of my own below, many of them prompted by things I’ve seen elsewhere. Hopefully they can provide some inspiration to you in turn! You can find most of these (and more) on instagram: @tndines. Also check out James’ Cult of Personality!