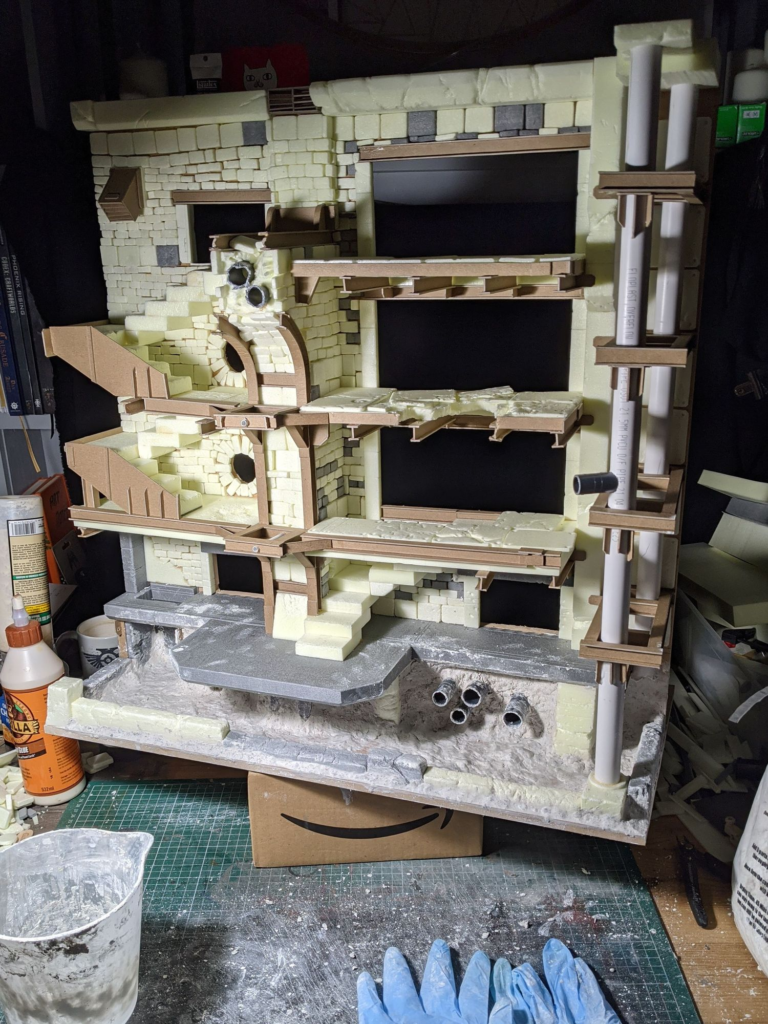
A short update this time.
With the majority of the structure modelled in, it was time to start developing the infrastructure and earth surrounding the pool at the bottom of the board. For this I went for Sculptamold, which is a mix of plaster and fibres, that forms a reasonable strong base layer. The pool water will be transparent resin, but that will be a future activity.
Other people can get really good ground and earth effects with Sculptamold, but I haven’t ever had much luck with that. It is easy to work in-around things though, and for filling large gaps. It would also serve to break up the flat bottom of the pool to give a more natural shape, even if I needed to refine it later with other materials. As some resins can be quite aggressive to XPS foam, I wanted to ensure I had a good barrier between any water effects and the foam base of the structure. I also didn’t want the resin leaking out.

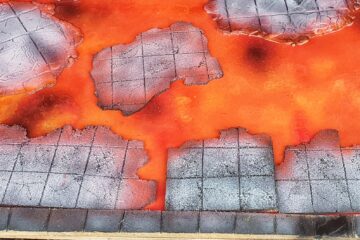
At this point I looked to build-up the back wall of the pool and fill around the pipes. It’s a pretty messy result. I could have wiped the pipes down with a wet cloth before the Sculptamold set, but I felt the texture on the metal would be a benefit later. In the above image, the rough finish I always seem to get with Sculptamold is quite visible on the pool walls, oh well.
With the bottom of the pool also filled it was time to use some Sculptamold to blend in around the outside of the weir. I tried to make sure it looked like sediment had banked up against the wall and underneath the ends of any pipes, but not anywhere with a strong flow where the water would have scoured away any material.

This angle shows a better view of the pool bottom. If this was going to be a playing surface I’d have to take a lot more care to ensure models could stand-up but, as it was, the resin pours would cover the roughness. However, I still wanted it to look like the bottom of a pool. With a smoothing pass using a ball of Sculptamold, and then rubbing the surface down with my finger tips as it cured, I’ve managed to smooth the Sculptamold a bit more but it’s still too lumpy for my preference. I’ll probably have to revisit this region with some materials closer to the resin stage.

Finally, between layers of sculptamold drying, I started detailing some of the joints and metal surfaces. These little rivets are easily made by cutting short lengths of 3D printer filament and sticking them on. I do have some more detailed rivet moulds but I don’t think these rivets will be visible enough to warrant using anything more fancy.
Up next time: Some side projects…